Download: starrating_plugin-0.7.7.zip
Downloading: starrating_plugin-0.7.7.zip Star Rating Plugin
Installation
- Download the plugin, and unzip it.
- Copy the starrating_plugin folder into the "plugins" folder of your b2evolution installation.
- Login to the administrative interface for your blog.
- Install the Star Rating plugin from the Global settings->Plugins install->Install new->Available plugins table using the [Install] link.
- You should add the following code to the index.main.php file for any skin where you want the star ratings to be used.
Put this one in the post loop inside the bSmallPrint div or just below the post title:
<!-- codeblock lang=php line=1 --><pre class="codeblock"><code><?php $Plugins->call_by_code( 'starrating', array('id' => $Item->ID ) ); ?> </code></pre><!-- /codeblock -->
(Optional) If you want to show the top rated posts add the Star rating widget from Blog settings > Widgets. By default, it shows links to the top five posts, but you can change the 'limit' param to get different results. You can also edit the minvote setting so that a certain number of votes are required before an item can make it into the top rated list.
Usage
Once you have the plugin installed and the settings the way you want them, then go the write tab and create a post. If you want the post to have the rating system, then make sure that there's a check in the box next to 'Star Rating' in the 'Text renderers' section in the lower right.
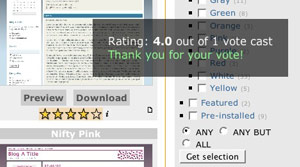
Now the stars should appear next to your post. To vote, click on the star you're voting for. If JavaScript is enabled, it will say 'Loading . . .', then display the new rating and thank you for your vote. If JavaScript is disabled, then the page will reload and the new rating will be shown.
Settings
Out of
Choose the number of stars possible. The default is five. It's best to only change this value right after installing the plugin. If there are already votes cast using another max value, then your results will be skewed if you change this value. Uninstall the plugin, then reinstall it to clear any old votes, then change the value.
Check IP
By default, each vote is checked against a list of IP addresses to make sure it's not a duplicate. You can disable the check using this setting.
Pop-up info
This option, which is enabled by default, displays details about a rating and notices (after you vote) in a JavaScript popup that fades in and then back out after 4 seconds. If you use this feature, be sure to place the additional skin tag (notice) just after your opening body tag (see above). This option requires a little more work to set up and requires that the user have JavaScript enabled, but it is more attractive and does not disrupt your site layout when someone votes.
Inline info
If you check this box, details about a rating and notices (after a vote) are placed just below the stars. This does not require the notice skin tag or JavaScript, but it may disrupt your site layout when someone votes. It is possible to use both of the info options at the same time, but it could be considered a bit redundant.
Apply rendering
This plugin doesn't really use a renderer, but it uses the renderer checkbox setting to know which posts should have the star rating available. Edit this plugin setting to set whether the checkbox is checked by default. For example, if you only want a few of your posts to have the rating system, then set 'Apply rendering' to 'opt-in'. Then, posts won't have the stars unless you check the box when you're writing a post. If you want all or almost all of the posts to have the rating system, then set the 'Apply rendering' in the plugin settings to 'opt-out'. Then, all posts will have the stars unless you uncheck the box in the write tab.
Customization
Change star image
It's not hard to change the star image. First, download the default image and look at it. It's three stars stacked on top of each other. The top star is the empty version, the middle star is the hover version, and the bottom star is the normal one that shows the average rating. Create your new image to match this template, then upload it to the /starrating_plugin/ folder. Then, edit the stars.css file to match your new file name. If your image has a width that's different than 20px, then you'll need to edit the two lines toward the top of stars.css that set the width. Then edit _starrating.plugin.php and find "var $width = 20;" and edit the value
Known issues
This plugin uses the prototype + scriptaculous library, but b2evolution is supposed to use jquery. This could cause an incompatibility. The next major version of this plugin will be built with jquery.


