Download: shareaholic_plugin-1.0.zip
Downloading: shareaholic_plugin-1.0.zip Shareaholic Plugin
Installation
You can use this plugin in your site by following the regular plugins installation process detailed in this manual page: Plugins Available For Installation.
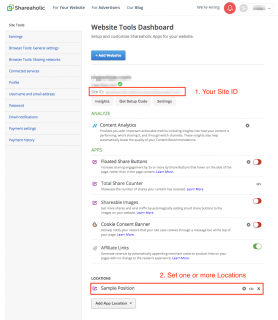
- Go to the Shareaholic website (http://www.shareaholic.com/), register a new user account (if you have not done it yet) and login into the site.
- Go to the Website Dashboard and add a new website. You will get a
Site ID, a string of 32 alphadecimal characters. - Scroll down into the App Locations section and add a new one, configuring the layout and services that you want to display in your site. You will get a
Location APP ID. - Go back to your b2evolution site and open the plugins settings page of the collection in which you want to display the Shareaholic widget: Plugin Settings (Per Collection / Blog)
- Enable the plugin for that collection and paste the
Site IDandLocation APP ID.
As this is a Text Renderer plugin, you may control when to enable / disable it for individual posts by checking the Shareaholic option in the Text Renderers panel of the posts' edition form.


